Quantcast
Channel: PHP Melody Support
Viewing all 37 articles
Browse latest View live

PHP Melody Critical Vulnerability Fix (Jan 2017)

$
0
0

PHP Melody releases before January 26th 2017 are vulnerable to SQL injection and should be patched immediately.

In case you cannot use the official package to update your PHP Melody website(s), simply apply the following changes to patch your site against intrusion. Updating is still required but can be safely postponed to a later date.

Open file: /comment.php

Find:

$user_id = $_POST['user_id'];

Replace with:

$user_id = 0;

If you have Mobile Melody installed:

Open file: /mobile/comment.php

Find:

$user_id = $_POST['user_id'];

Replace with:

$user_id = 0;

For PHP Melody versions v2.5 and later, phpmailer can be easily updated as well.

Download phpmailer.zip and replace your existing /include/phpmailer/ folder with the one form the zip archive.

These two code patches should provide adequate security to your PHP Melody website(s). We do however recommend updating to the latest PHP Melody version to fix any pending bugs.

To download the complete update packages visit your customer account with us. To patch this critical vulnerability, you need to run at least PHP Melody v2.7.1.

Troubleshooting Automated Jobs

$
0
0

When all your automated jobs show “Last Performed” as “Never”, your cron job might not be running. There are several common causes for this.

Case #1

Usually, the cause is forgetting to set up a cron job in the first place.We detail how to setup your new cron job in our help documents.

Case #2

Another problem might be with the server’s configuration. Hosting providers sometimes limit what commands Cron can run. For example, Inmotionhosting does not allow you to run wget at all. They do allow lynx or curl instead.

However the majority of hosting providers allow you to run wget. To make sure your hosting provider is OK with wget, Google search for: your hosting provider + cron“.  This should help you find if they forbid or allow wget via cron.  In case they don’t allow wget, adjust your crontab command as they recommend it.

Case #3

And lastly, it may be a permissions thing. See that your /cron.php file from your PHP Melody installation has the 755 permissions (i.e. is executable).

Each hosting company does things their own way. If none of these tips helped, contact your hosting provider and ask them to set up this cron job for you.

How to Insert JavaScript Code into PHP Melody

$
0
0

Inserting any Javascript code (e.g. AdSense) into PHP Melody’s *.tpl files is very easy.

Since PHP Melody uses the Smarty template engine you do need to wrap your Javascript code between an open and close {literal} tags.

Here’s an example of how the AdSense code should be added into the <head> part of your site.

{literal}
<script async src="//pagead2.googlesyndication.com/pagead/js/adsbygoogle.js"></script>
<script>
  (adsbygoogle = window.adsbygoogle || []).push({
    google_ad_client: "ca-pub-0000000000000",
    enable_page_level_ads: true
  });
</script>
{/literal}

Note the opening and closing {literal} tags. That’s how any kind of Javascript code should be injected into any of the *.tpl files from PHP Melody.

For the official documentation please visit:
http://www.smarty.net/docs/en/language.function.literal.tpl

PHP Melody Critical Vulnerability Fix (Aug 2017)

$
0
0

PHP Melody websites running anything from v2.2 to v2.7.1 are vulnerable to SQL injection and should be patched immediately as instructed below. Alternatively, you can download the v2.7.2 update package form your Customer Account with us.

To manually patch the issue, please open: /include/functions.php

Find:

	$id = ($list_id != false) ? $list_id : $list_uniq_id;
	$get_by_id = ($list_id != false) ? 'list_id' : 'list_uniq_id';

Replace with:

	if ($list_uniq_id != false && ctype_alnum($list_uniq_id) === false)
	{
		return false;
	}
	
	$id = ($list_id != false) ? (int) $list_id : secure_sql($list_uniq_id);
	$get_by_id = ($list_id != false) ? 'list_id' : 'list_uniq_id';

Find:

	$sql = "SELECT list_uniq_id 
			FROM pm_playlists 
			WHERE list_id = $list_id";

Replace with:

	$list_id = secure_sql($list_id);	
	
	$sql = "SELECT list_uniq_id 
			FROM pm_playlists 
			WHERE list_id = $list_id";

Find:

	$sql = 'SELECT * 
			FROM pm_playlists 
			WHERE user_id = '. $user_id;

Replace with:

	$user_id = secure_sql($user_id);
	
	$sql = 'SELECT * 
			FROM pm_playlists 
			WHERE user_id = '. $user_id;


How to Setup Google Login

$
0
0

Starting with PHP Melody v3.0 you can enable Google Sign-in for your users.

All you need to do, is obtain a free CLIENT ID form Google.

Step 1: Create A New Project

Log into your desired Google account and visit this URL and create or select an existing project:
https://console.developers.google.com/

View post on imgur.com


Step 2: Update Your Credentials

Illustrated here.

  1. Select the newly created project
  2. Go to the Credentials tab and click on the “Web client (Auto-created for Google Sign-in) link (as seen here)
  3. Specify your PHP Melody installation URL into the two ‘Authorize‘ fields (as seen here)
  4. Save your changes.

Step 3: Add your CLIENT ID into PHP Melody

Illustrated here.

Log into your PHP Melody website’s back-end and go to Settings > User tab.

Enter your keys in the Google Login form which is found under the User tab.

Only thing left to do is Enable the Google Login, hit ‘Save Changes‘ and you’re ready to accept Twitter users.

If you’d also like to integrate Facebook Login into your PHP Melody website, check out this tutorial.

How to Update the Social Links from your template

$
0
0

Open footer.tpl form your current theme folder:

/templates/{current theme}/

Since it’s a basic HTML file, you can edit this file with any text editor.

Find in file the list-social-sites CSS selector.

You should be taken to the HTML responsible for your social links. It  should looks something like:

<li><a href="#"><i class="fa fa-facebook"></i></a></li>
<li><a href="#"><i class="fa fa-twitter"></i></a></li>
<li><a href="#"><i class="fa fa-youtube"></i></a></li>
<li><a href="#"><i class="fa fa-instagram"></i></a></li>

or

<li><i class="fa fa-facebook"></i> <a href="#">Facebook</a></li>
<li><i class="fa fa-twitter"></i> <a href="#">Twitter</a></li>
<li><i class="fa fa-youtube"></i> <a href="#">YouTube</a></li>
<li><i class="fa fa-instagram"></i> <a href="#">Instagram</a></li>

Replace # with your own social profile links.

Save changes and re-upload the modified file into your theme folder:

/templates/{current theme}/

How to Fix Layout Issues

$
0
0

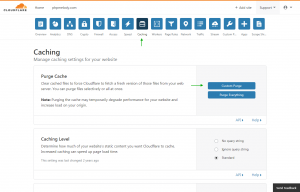
If you’ve upgraded from v2.x to v3.x and experience layout issues such as duplicate icons (admin area) or slow load times in the front-end, please be sure to “purge your cache” from your CloudFlare account.

If you don’t use CloudFlare, your webhost might be caching or compressing your CSS and JS files. Ask your webhost to purge the cache for your account.

And if you still experience problems with the front-end layout, please delete the files from your /Smarty/templates_c/ folder.


How to Setup Twitter Login

$
0
0

Starting with version 2.7, PHP Melody comes with social login integration for both Twitter and Facebook.

In this tutorial we’ve set out to cover the Twitter integration. We’ll take you through the steps required to create a new app in Twitter and integrate this into PHP Melody.

The ultimate goal being to allow your visitors to register and log in using only their Twitter account.

Step 1: Creating a new Twitter App

Log into your Twitter account and then go to https://apps.twitter.com/

Click on the ‘Create a new app’ button and fill in the provided form. Very easy and straightforward.

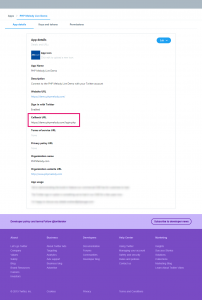
Under the ‘Callback URL‘ you need to enter:
https://www.your-PHPMELODY-site.com/login.php

Your application should look like this: https://imgur.com/a/tm3Pj6K

Step 2: Get your API Key and API Secret

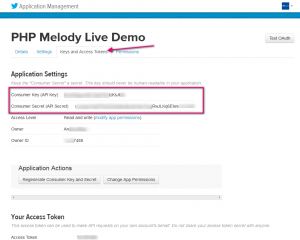
Once successfully created, your new Twitter App will come with a Consumer Key (API Key) and a Consumer Secret (API Secret).

Go to your Twitter App from https://apps.twitter.com/ and select the “Keys and Tokens” tab.

Copy the API Key and Secret into a text file.
If you have trouble locating the keys, here’s where they are:

Step 3: Add your Twitter API Key and API Secret into PHP Melody

Log into your PHP Melody website’s back-end and go to Settings > User tab.

Enter your keys in the Twitter Login form which is found under the User tab.

Only thing left to do is Enable the Twitter Login, hit ‘Save Changes‘ and you’re ready to accept Twitter users.

If you’d also like to integrate Facebook Login into your PHP Melody website, check out this tutorial.


How to Setup Facebook Login

$
0
0

Starting with version 2.7, PHP Melody comes with social login integration for both the Twitter and Facebook social networks.

In this tutorial we’ve set out to cover the Facebook integration. The Twitter integration is covered in this tutorial.

We’ll take you through the steps required to create a new app in Facebook and integrate this into PHP Melody.

The ultimate goal being to allow your visitors to register and log in using only their Facebook account.

Step 1: Creating a new Facebook App

Log into your Facebook account and then go to https://developers.facebook.com/apps/

  • Click on the ‘Add New App‘ button, select ‘Website (www)‘ as the platform.
  • Enter your apps’ name and click ‘Create new Facebook App ID‘. Fill in the form and proceed to ‘Create App ID‘.
  • Fill in your ‘Site URL‘ and click ‘Next‘.
  • You’re now finished setting your Facebook App.

Step 2: Setting your new Facebook App

You should now see your new Facebook app listed under:
https://developers.facebook.com/apps/

  • Click on your new app
  • Under ‘Products’ click + Add Product
  • Select ‘Facebook Login‘ and click ‘Get Started
  • You will be presented with a form.
    Under ‘Valid OAuth redirect URIs‘ you need to enter your URL as such:
    https://www.your-site.com/login.php?do=facebook&step=confirm
  • Save the changes.

Since the app is not yet live, you need to make it available to the public so that Facebook users can log into your PHP Melody website using their Facebook account.

Facebook APP ID & Client Token for PHP Melody (2019)

Step 3: Add your Facebook APP ID and APP Secret into PHP Melody

You can now retrieve and use your App’s ID and Secret and add them into your PHP Melody installation. Here’s where to find your App ID and App Secret:

Facebook APP ID & Client Token for PHP Melody (2019)

Log into your PHP Melody website’s back-end and go to Settings > User tab.

Enter your keys in the Facebook Login form which is found under the User tab.

Only thing left to do is Enable the Facebook Login, hit ‘Save Changes‘ and you’re ready to accept Facebook users.

Note: Sometimes the ‘Check App Status‘ button from your PHP Melody admin area might return an error message. You can safely ignore this error message if the front-end Facebook Login works.

Disable CSRF

$
0
0

PHP Melody uses CSRF protection by default. If you experience the following error message in your back-end, please consider disabling CSRF:

Invalid token or session expired. Please load this page from the menu and try again.

Here’s how to do it:

Disable CSRF

PHP Melody Critical Vulnerability Fix (Jan 2017)

$
0
0

PHP Melody releases before January 26th 2017 are vulnerable to SQL injection and should be patched immediately.

In case you cannot use the official package to update your PHP Melody website(s), simply apply the following changes to patch your site against intrusion. Updating is still required but can be safely postponed to a later date.

Open file: /comment.php

Find:

$user_id = $_POST['user_id'];

Replace with:

$user_id = 0;

If you have Mobile Melody installed:

Open file: /mobile/comment.php

Find:

$user_id = $_POST['user_id'];

Replace with:

$user_id = 0;

For PHP Melody versions v2.5 and later, phpmailer can be easily updated as well.

Download phpmailer.zip and replace your existing /include/phpmailer/ folder with the one form the zip archive.

These two code patches should provide adequate security to your PHP Melody website(s). We do however recommend updating to the latest PHP Melody version to fix any pending bugs.

To download the complete update packages visit your customer account with us. To patch this critical vulnerability, you need to run at least PHP Melody v2.7.1.
Troubleshooting Automated Jobs

$
0
0

When all your automated jobs show “Last Performed” as “Never”, your cron job might not be running. There are several common causes for this.

Case #1

Usually, the cause is forgetting to set up a cron job in the first place.We detail how to setup your new cron job in our help documents.

Case #2

Another problem might be with the server’s configuration. Hosting providers sometimes limit what commands Cron can run. For example, Inmotionhosting does not allow you to run wget at all. They do allow lynx or curl instead.

However the majority of hosting providers allow you to run wget. To make sure your hosting provider is OK with wget, Google search for: your hosting provider + cron“.  This should help you find if they forbid or allow wget via cron.  In case they don’t allow wget, adjust your crontab command as they recommend it.

Case #3

And lastly, it may be a permissions thing. See that your /cron.php file from your PHP Melody installation has the 755 permissions (i.e. is executable).

Each hosting company does things their own way. If none of these tips helped, contact your hosting provider and ask them to set up this cron job for you.

How to Insert JavaScript Code into PHP Melody

$
0
0

Inserting any Javascript code (e.g. AdSense) into PHP Melody’s *.tpl files is very easy.

Since PHP Melody uses the Smarty template engine you do need to wrap your Javascript code between an open and close {literal} tags.

Here’s an example of how the AdSense code should be added into the <head> part of your site.

{literal}
<script async src="//pagead2.googlesyndication.com/pagead/js/adsbygoogle.js"></script>
<script>
  (adsbygoogle = window.adsbygoogle || []).push({
    google_ad_client: "ca-pub-0000000000000",
    enable_page_level_ads: true
  });
</script>
{/literal}

Note the opening and closing {literal} tags. That’s how any kind of Javascript code should be injected into any of the *.tpl files from PHP Melody.

For the official documentation please visit:
https://www.smarty.net/docs/en/language.function.literal.tpl

PHP Melody Critical Vulnerability Fix (Aug 2017)

$
0
0

PHP Melody websites running anything from v2.2 to v2.7.1 are vulnerable to SQL injection and should be patched immediately as instructed below. Alternatively, you can download the v2.7.2 update package form your Customer Account with us.

To manually patch the issue, please open: /include/functions.php

Find:

	$id = ($list_id != false) ? $list_id : $list_uniq_id;
	$get_by_id = ($list_id != false) ? 'list_id' : 'list_uniq_id';

Replace with:

	if ($list_uniq_id != false && ctype_alnum($list_uniq_id) === false)
	{
		return false;
	}
	
	$id = ($list_id != false) ? (int) $list_id : secure_sql($list_uniq_id);
	$get_by_id = ($list_id != false) ? 'list_id' : 'list_uniq_id';

Find:

	$sql = "SELECT list_uniq_id 
			FROM pm_playlists 
			WHERE list_id = $list_id";

Replace with:

	$list_id = secure_sql($list_id);	
	
	$sql = "SELECT list_uniq_id 
			FROM pm_playlists 
			WHERE list_id = $list_id";

Find:

	$sql = 'SELECT * 
			FROM pm_playlists 
			WHERE user_id = '. $user_id;

Replace with:

	$user_id = secure_sql($user_id);
	
	$sql = 'SELECT * 
			FROM pm_playlists 
			WHERE user_id = '. $user_id;


How to Setup Google Login

$
0
0

Starting with PHP Melody v3.0 you can enable Google Sign-in for your users.

All you need to do, is obtain a free CLIENT ID form Google.

Step 1: Create A New Project

Log into your desired Google account and visit this URL and create or select an existing project:
https://console.developers.google.com/

View post on imgur.com


Step 2: Update Your Credentials

Illustrated here.

  1. Select the newly created project
  2. Go to the Credentials tab and click on the “Web client (Auto-created for Google Sign-in) link (as seen here)
  3. Specify your PHP Melody installation URL into the two ‘Authorize‘ fields (as seen here)
  4. Save your changes.

Step 3: Add your CLIENT ID into PHP Melody

Illustrated here.

Log into your PHP Melody website’s back-end and go to Settings > User tab.

Enter your keys in the Google Login form which is found under the User tab.

Only thing left to do is Enable the Google Login, hit ‘Save Changes‘ and you’re ready to accept Twitter users.

If you’d also like to integrate Facebook Login into your PHP Melody website, check out this tutorial.


How to Update the Social Links from your template

$
0
0

Open footer.tpl form your current theme folder:

/templates/{current theme}/

Since it’s a basic HTML file, you can edit this file with any text editor.

Find in file the list-social-sites CSS selector.

You should be taken to the HTML responsible for your social links. It  should looks something like:

<li><a href="#"><i class="fa fa-facebook"></i></a></li>
<li><a href="#"><i class="fa fa-twitter"></i></a></li>
<li><a href="#"><i class="fa fa-youtube"></i></a></li>
<li><a href="#"><i class="fa fa-instagram"></i></a></li>

or

<li><i class="fa fa-facebook"></i> <a href="#">Facebook</a></li>
<li><i class="fa fa-twitter"></i> <a href="#">Twitter</a></li>
<li><i class="fa fa-youtube"></i> <a href="#">YouTube</a></li>
<li><i class="fa fa-instagram"></i> <a href="#">Instagram</a></li>

Replace # with your own social profile links.

Save changes and re-upload the modified file into your theme folder:

/templates/{current theme}/

How to Fix Layout Issues

$
0
0

If you’ve upgraded from v2.x to v3.x and experience layout issues such as duplicate icons (admin area) or slow load times in the front-end, please be sure to “purge your cache” from your CloudFlare account.

If you don’t use CloudFlare, your webhost might be caching or compressing your CSS and JS files. Ask your webhost to purge the cache for your account.

And if you still experience problems with the front-end layout, please delete the files from your /Smarty/templates_c/ folder.


Viewing all 37 articles
Browse latest View live